It feels like ages ago, but just a while back I was in a competition called Creating with the Stars. I had such a blast working with Michael to come up with projects in just a matter of days, and this was definitely my favorite.
I talked a bit about the space here, but today I wanted to share a template for the stencil and, while the process is rather self-explanatory, some step by step’s.
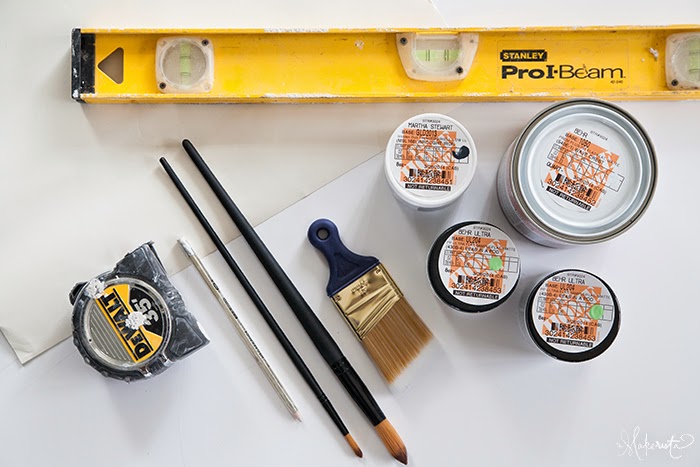
painter’s tape
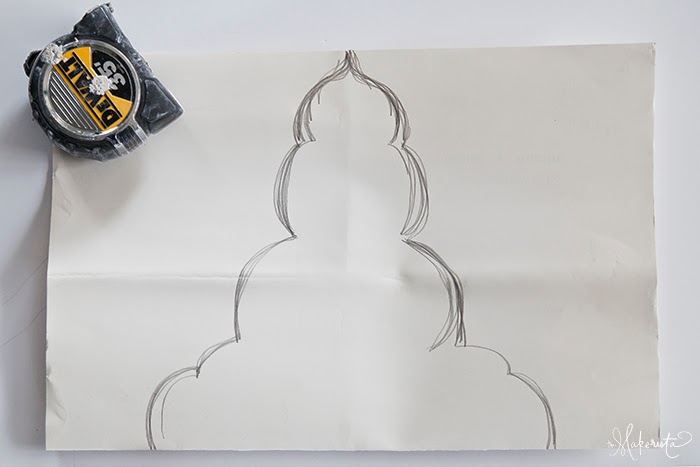
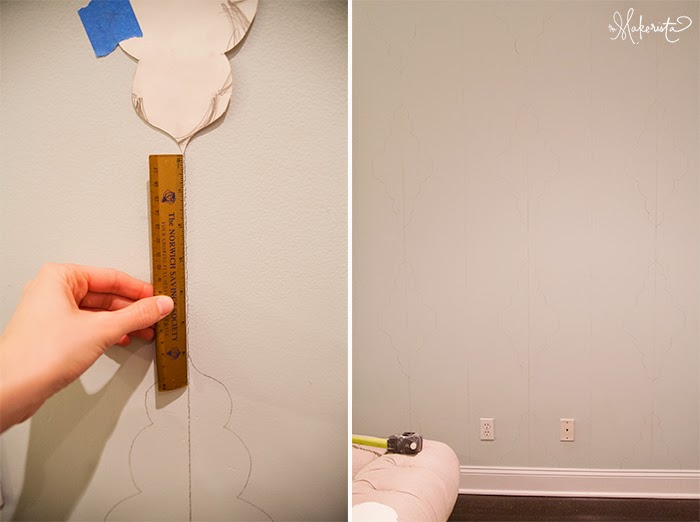
I folded an old poster we had in half and roughly sketched out the shape I was going for. You can do this yourself, or if sketching scares you, you can find a download here. My stencil was a bit wider than an average printer could print, so I broke it down into 3 sections (1 for the top and bottom, 1 for the middle) and made it about an inch smaller. This way you can print it out at home and tape it together to get one big piece. If you’re like me, you’ll find the urge to do this in the middle of nap time, and the idea of running to kinkos right before dinner to have something printed is a nightmare you’d rather not have. The last thing I want is a template that calls to be blown up by 100%. If I can’t do it at home, it’s probably not going to happen.

Cut out your template and give it a try on the wall. Take outlet and window placement into account and if you live in an older home, your floors or ceiling might not be level. I made a few extra just for perspective’s sake.
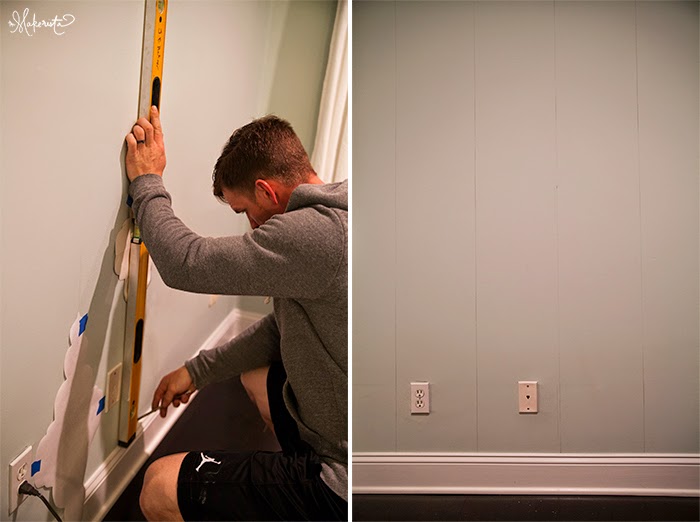
Grab a long level and start making lines up the wall. We placed ours 12″ apart.

Starting at the bottom and in the center, I traced half of a pattern.
Then I measured 6″ up the wall and traced another one. Once I made it to the top of that line, I skipped a line and then stenciled the next line the same way. I worked in that same manner until every other line was stenciled. Be sure to check your spacing across the wall with the level often.
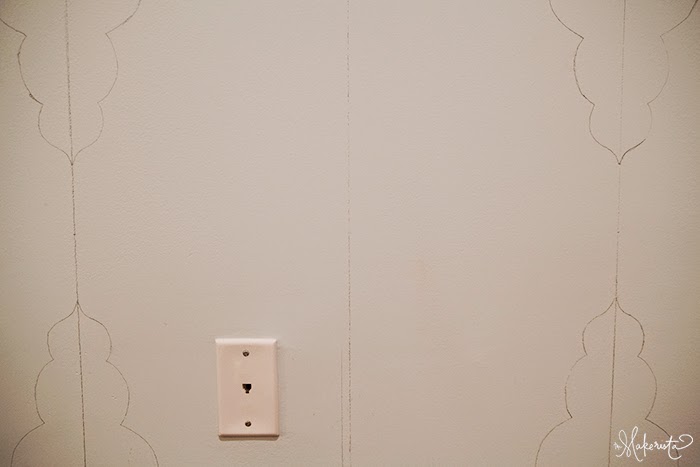
Now it was time to go back and do the lines I had skipped. You want the stencil’s center to be level with the middle of the line in between the parallel patterns. I found the center of that line, 3″ for my 6″ space, and used the level to mark that same spot on the line I was working on. Just remember to continue checking things with the level.

After a few hours sleep (I wish I was kidding) I took the Wooster angle brush and began filling in the stencil with the light blue. You don’t have to be precise with this since you’ll be outlining with the other colors.

Once you’ve done all of the blue take the fat artist brush and outline the stencil with the green.
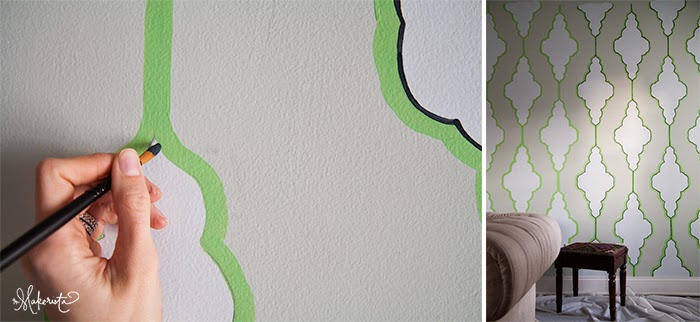
Finally, come back with the thinner brush and cover up the pencil marks with the navy paint.
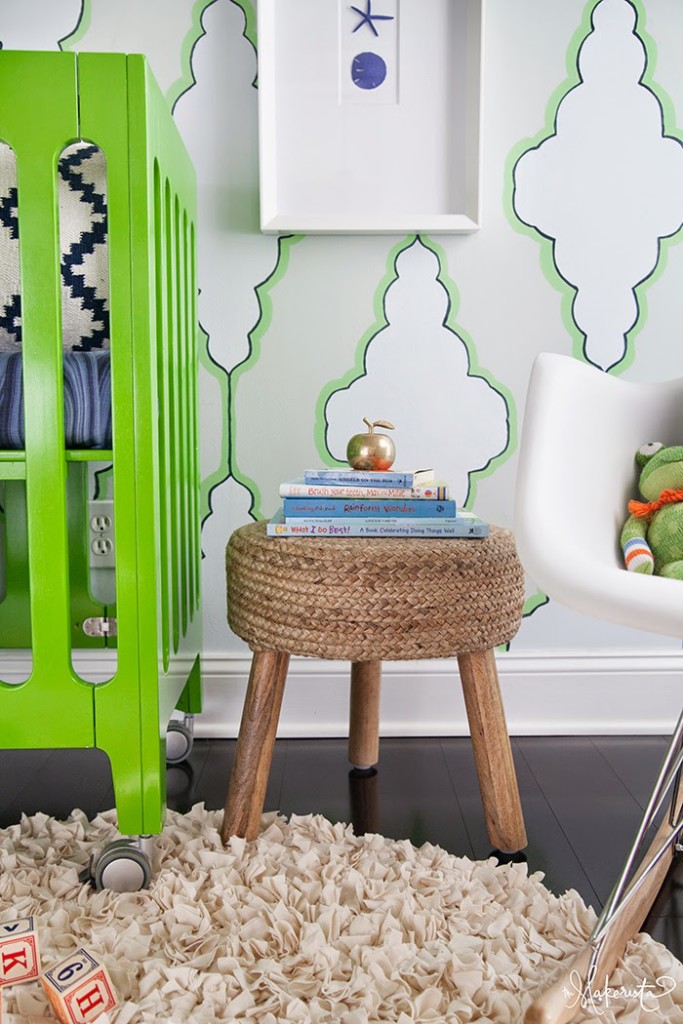
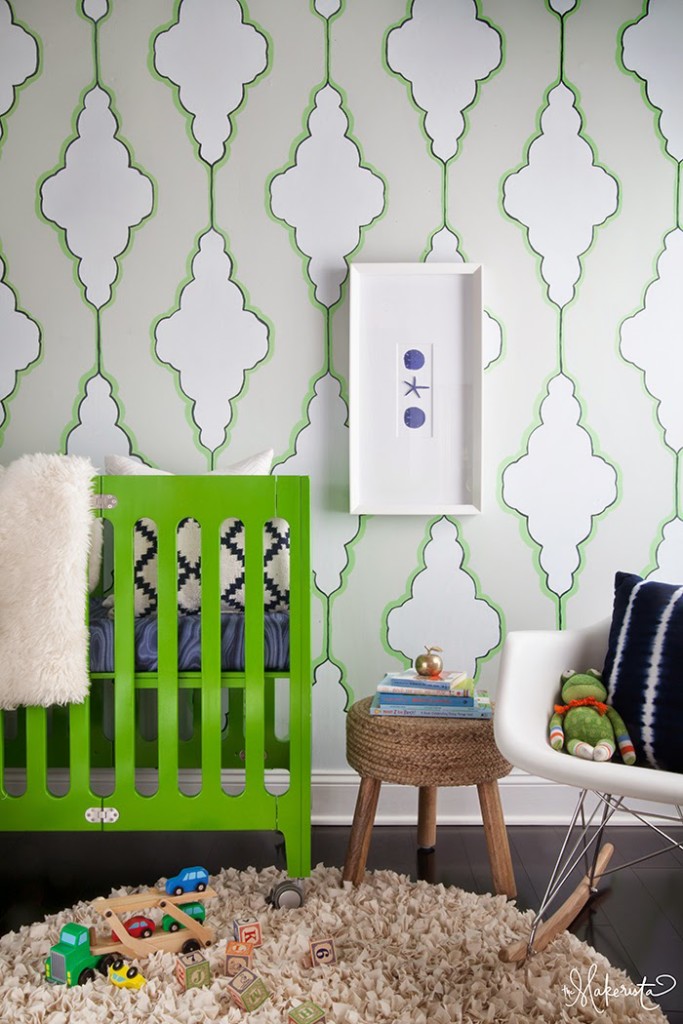
I absolutely love this treatment, and while it took some time, the hand-done look made it fun to achieve and more modern than a lot of the stenciling we’ve seen lately.
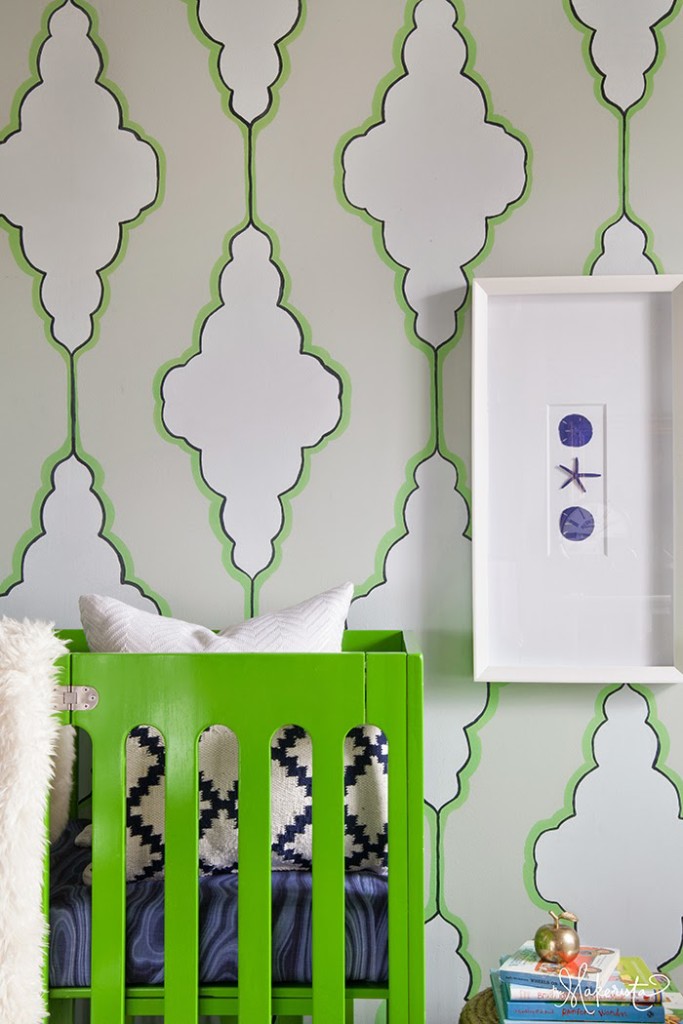
While this application is fun for a nursery or kids space, I think it would work really well in a guest bath or even a dining room. I love the mix of the pastels with the brighter green, but it would be beautiful in soft pinks or even shades of greys and creams. Have a wonderful week!
On a side note, I hope those of you who are mother’s had a really special weekend! I was blessed with donuts and singing and all sorts of love. I’ve been working on a song for an upcoming service that feels really fitting to share with you. It’s so lovely and incredibly moving.


I agree, this would look so pretty in a dining room too. Love it
Looks great–you know I love a big statement wall 🙂 Also like the new profile pic. Teach me to look like a supermodel, please!
I loved this project! So whimsical 🙂
I've been waiting for this! So excited. What colors did you use? Thanks
Glad you were excited for it, Amber! The colors I used are Behr's Wave Crest, Behr's Peas in a Pod, and Martha Stewarts Wrought Iron. Let me know if you give it a go!
This is such a lovely pattern it would look great in any room. Love the colors you used as well!
I've been waiting to see how you did this! I love the hand drawn element too, looks like crazy expensive wall paper!
Thanks, Brittany! I'll take that nice compliment. 😉
I love how this turned out!
Thanks, Bethany!
Your pattern looks great! It's Moroccan trellis…straight out of Shangri La! 😉
Thanks, and how appropriate! 🙂
really love the hand-drawn outlines, and the pretty contrasting color combo. you should make this into a pattern and offer it on spoonflower, so everyone could get a little piece of this beauty.
What an idea! I might need to try that, I do love Spoonflower and have a few florals patterns on there.
Still sad it was such a short-lived treatment in your house! And beautiful song. I watch my daughters like a love-crazed stalker every night after they fall asleep.
This is great Gwen!! I love how it's slightly free form – so much easier when stenciling!
What an incredible labor of love! Every inch so dang chic- from the pattern to the palette…I can see this working for years down the line! Amazing transformation!
xo-Julie
Peace. Love. LOL!
Haute Khuuture Blog
Thanks so much, Julie!
the work was definately worth the result. stunning.
Hello! I have nominated you for the Versatile Blogger Award http://bit.ly/1iYnKil
This turned out great! Love the hand painted look of it. Love that song too. 🙂
Just beautiful! You have a ton of patience ~ 🙂
xo
Pat
I'm about to use your stencil in my dining room as an accent wall. Its just what I've been looking for to really make the room something special. I'll send a pic when it's completed :-).
I would love that! Best of luck, Jessica!