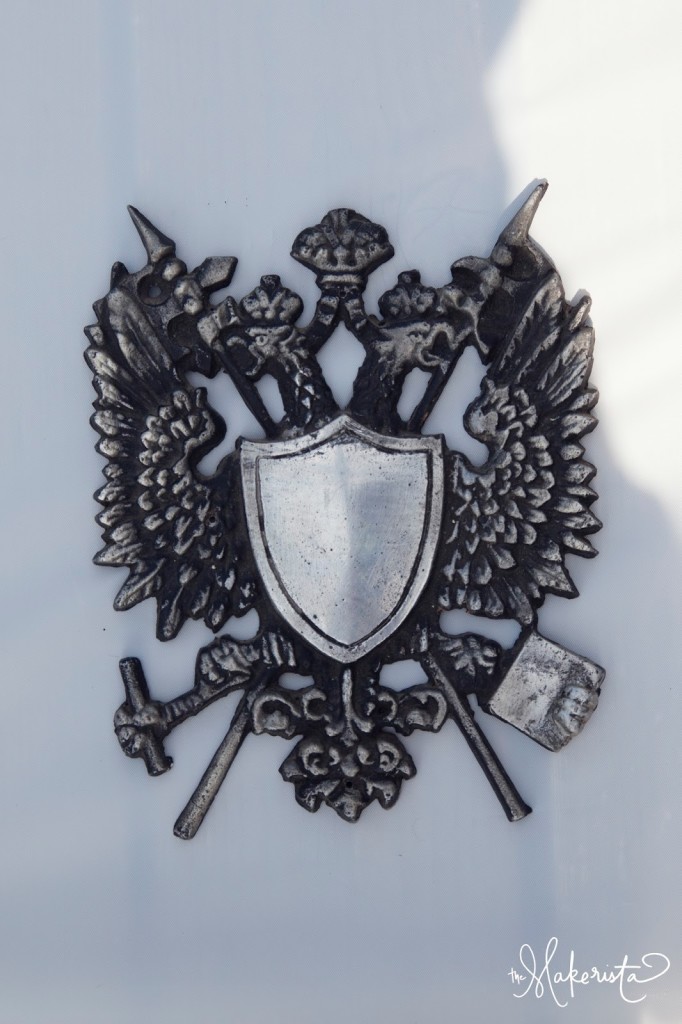
I thought it would be a good idea to show you how the crest went from this…
 to this.
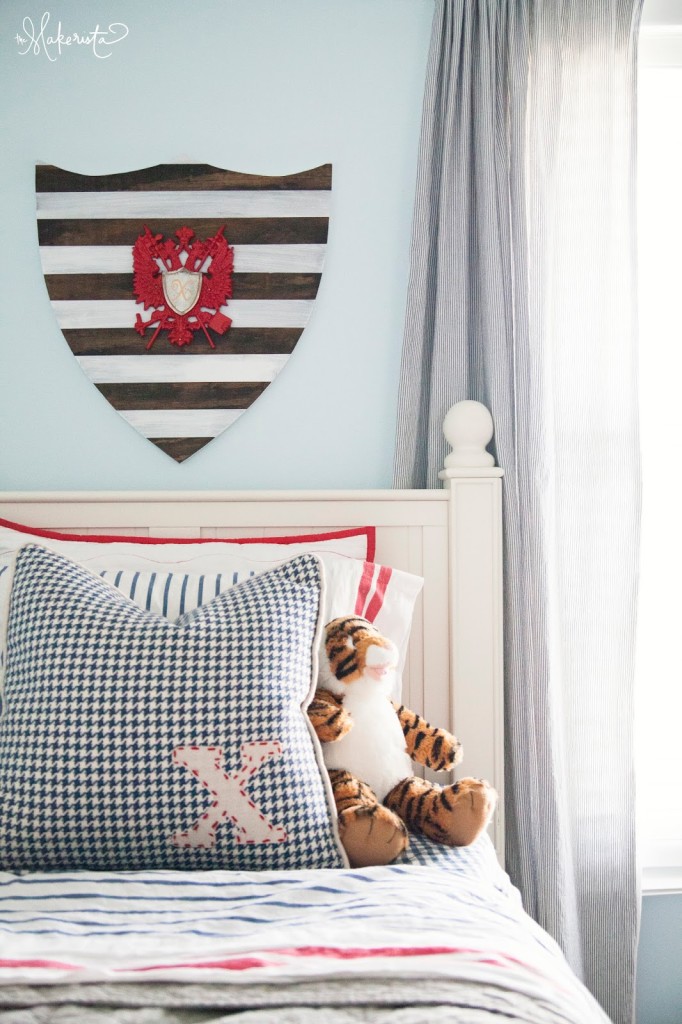
Sometimes I see a piece and I immediately know what I would do with it. But sometimes I see something I love and I’m not quite sure where I want to take it. I usually buy it anyway, because otherwise I will wish that I had. I stew on it awhile, it takes up space in my laundry room, and one day I have an “aha!” moment and then I get to work. But, even after that initial moment, I will still face several twists and turns throughout the process.
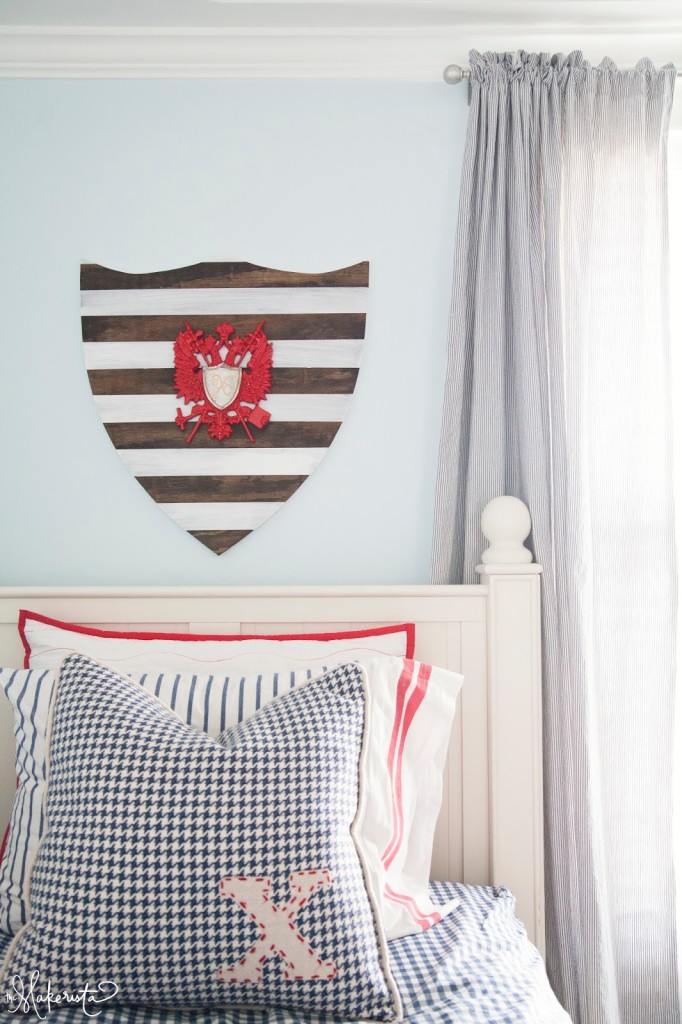
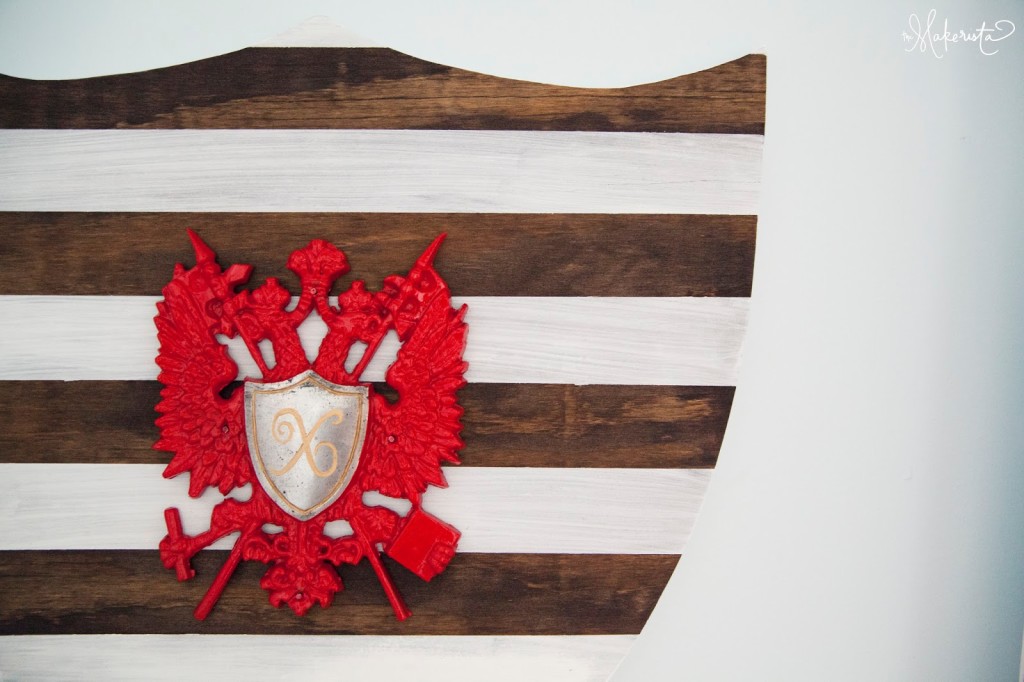
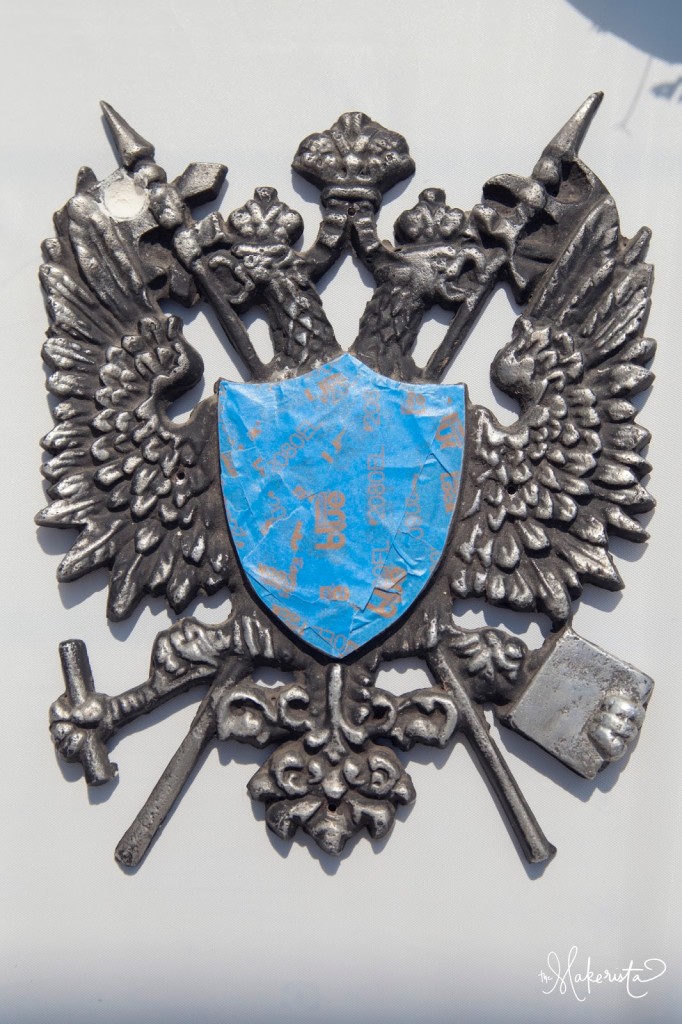 You can find out why I decided to put the crest in Xander’s room here. I was initially going to paint the entire crest, but at the last minute I decided to tape off the shield, thinking that would give it another dimension. I filled an extra hole with some spackle and then sprayed it with a few coats of Rustoleum’s Safety Red that I had leftover from another project.
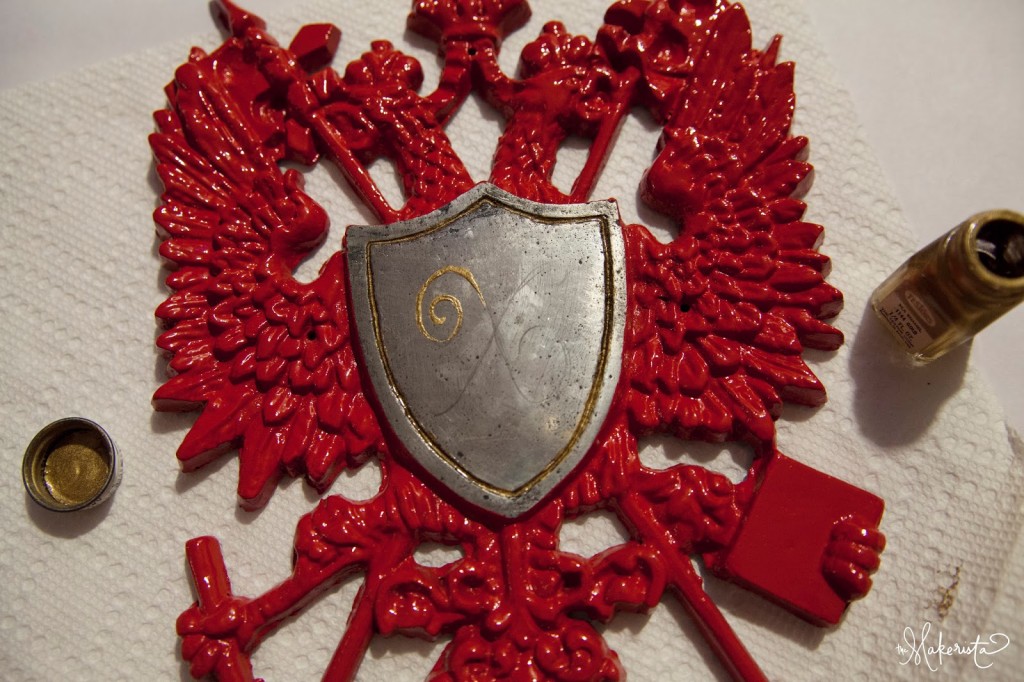
After the red had dried I sketched an “X” on the shield with a pencil. I pulled out some gold paint I had from my grandmother’s craft supplies and traced the “X” with a small paintbrush. I used a toothpick to fill in the border with some paint as well.
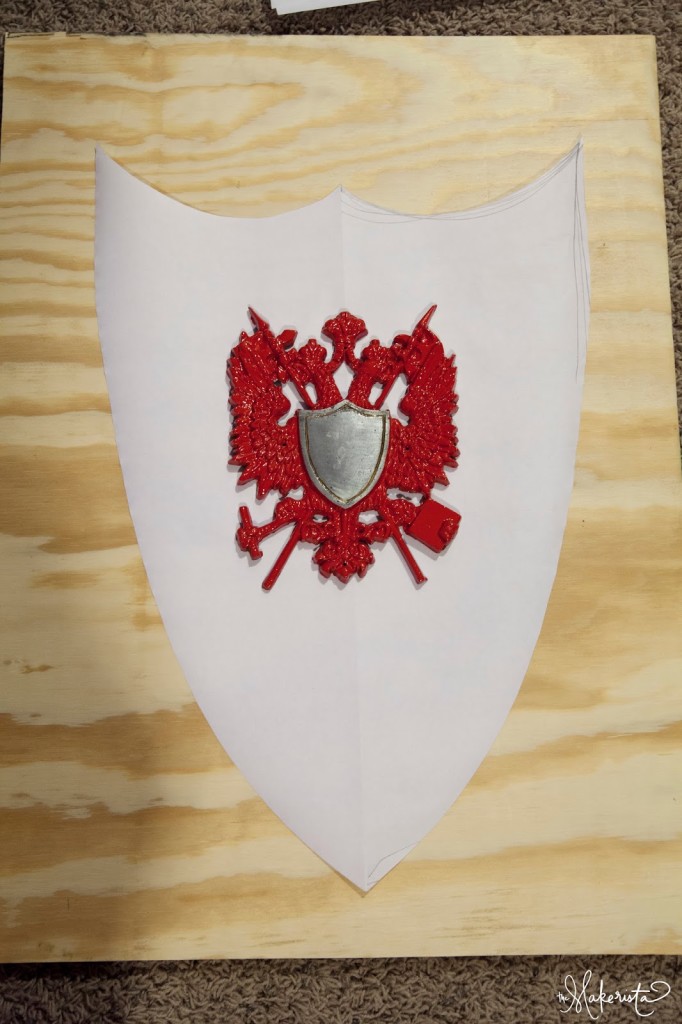
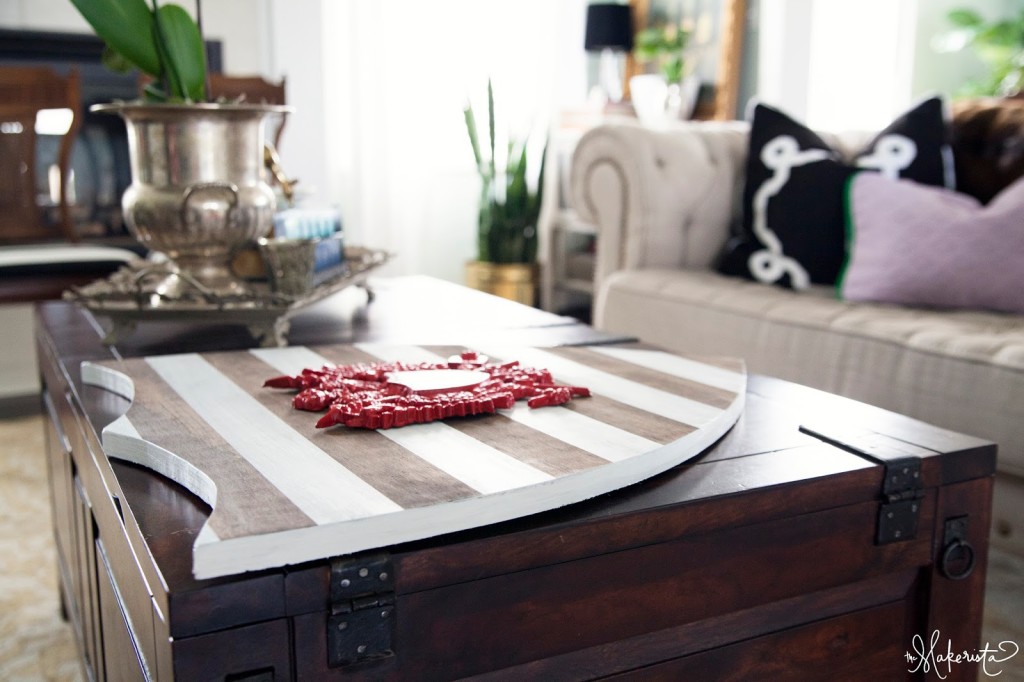
Since the crest wasn’t big enough for the space above Xander’s bed, I decided to add something behind it. I thought a shield that mimicked the metal shield would look nice. I found some extra plywood in the garage and while I could have just free-handed straight onto the plywood, I decided to fold a big piece of paper in half and draw the shield on the paper first (like how you made paper hearts when you were little) so it would be symmetrical. For some reason I didn’t get a picture of the paper pattern I ended up using. The one above was my first attempt which ended up being too skinny.
After tracing the pattern onto the board, I took the plywood to my woodworking father who quickly and kindly cut and sanded the piece for me. The key with plywood is to cut with the back side facing up, because sometimes the top layers will chip off a bit.
I brought the piece home and slapped some stain on the top (ruining a brand new shirt in the process…always wear paint clothes when you’re clumsy like me!). The stain looked great, but when I held it up in the space, it just seemed really heavy and dark. My initial thought was that some white stripes would lighten it up while modernizing it at the same time. This was the part of the project that was scariest for me. There’s always at least one moment in a project where I think, “this is either going to make or break this thing, and I’ve put a lot of time and energy in for this to go bad now!”
When I have one of these thoughts, I usually wait. I think I ended up sleeping on it before moving forward. If I still feel like it could work after a good night’s sleep, then I go for it.
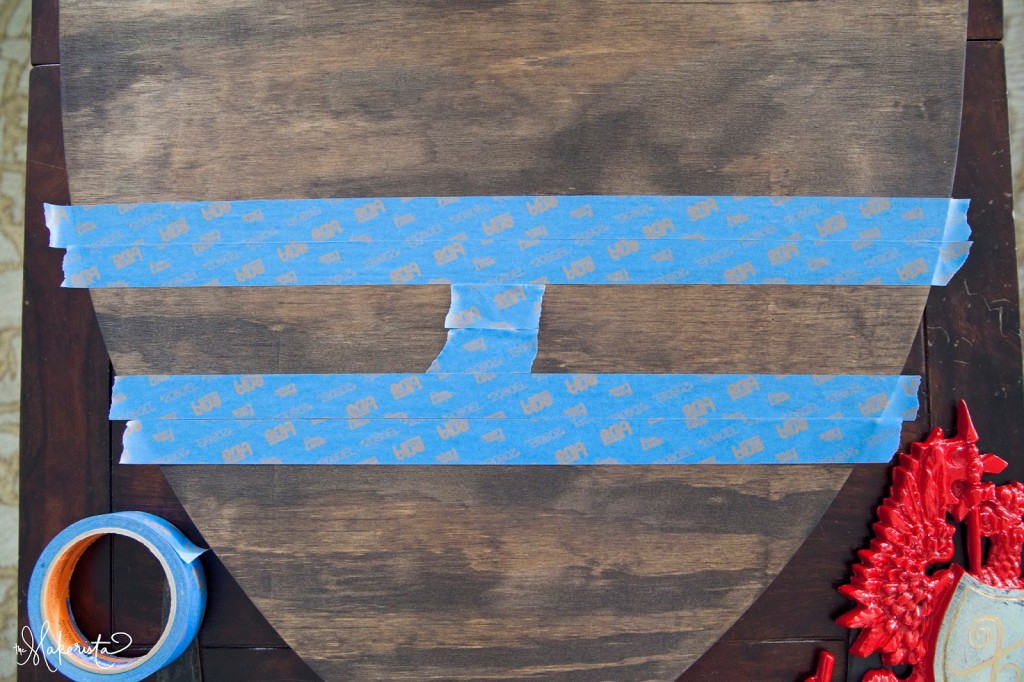
I got out some painter’s tape and just kind of eyeballed the first stripe. I used two small pieces of the tape to space out the remaining stripes. Usually I spend way too much time measuring things out, but I’m working on being a bit less obsessed with perfection, and this method worked really well! I got out some of our home’s trim paint and mixed together about 2/3 paint and 1/3 water in a cup. I painted the stripes with this whitewash mixture but used straight paint for the sides of the shield. While I was painting outside, our black lab did this.
Oops. A little deck abstract art?
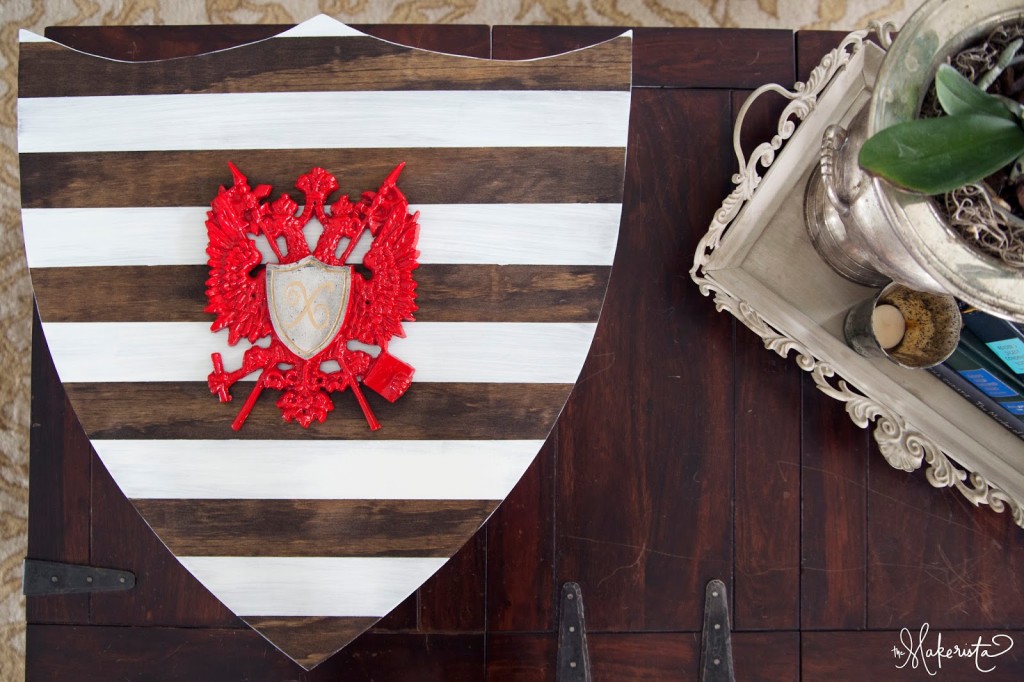

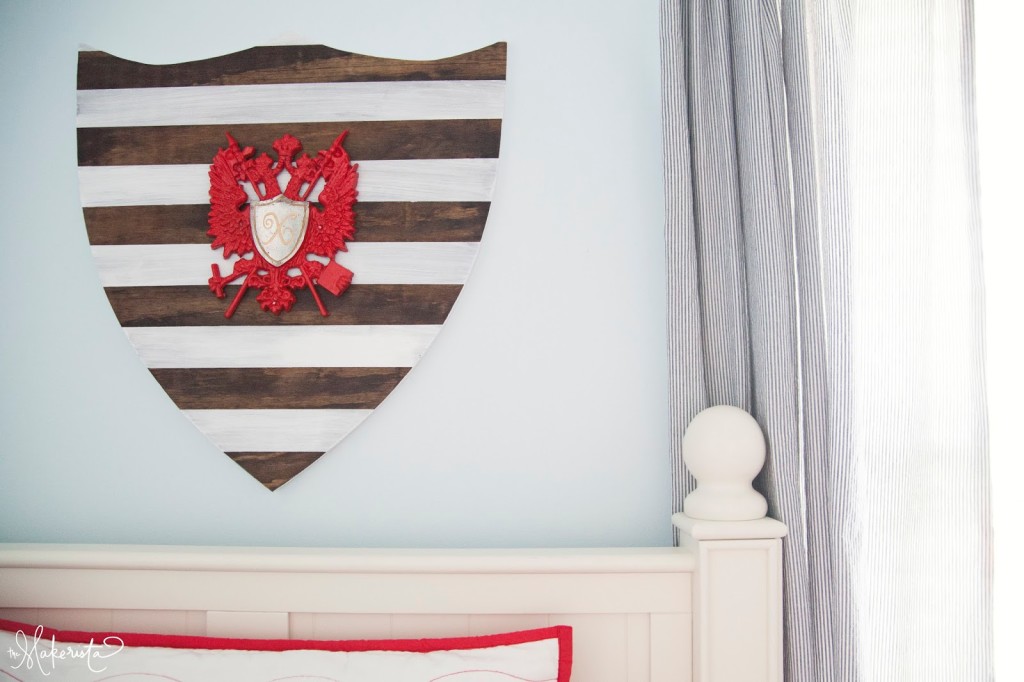
To attach the shield, my husband screwed the wood piece to the wall first. We got lucky, as there was a stud right in the center of where the shield needed to go.
Then he used some small nails from a picture hanging kit to attach the crest in the middle. I touched up the nails with a red sharpie that was almost an exact match.
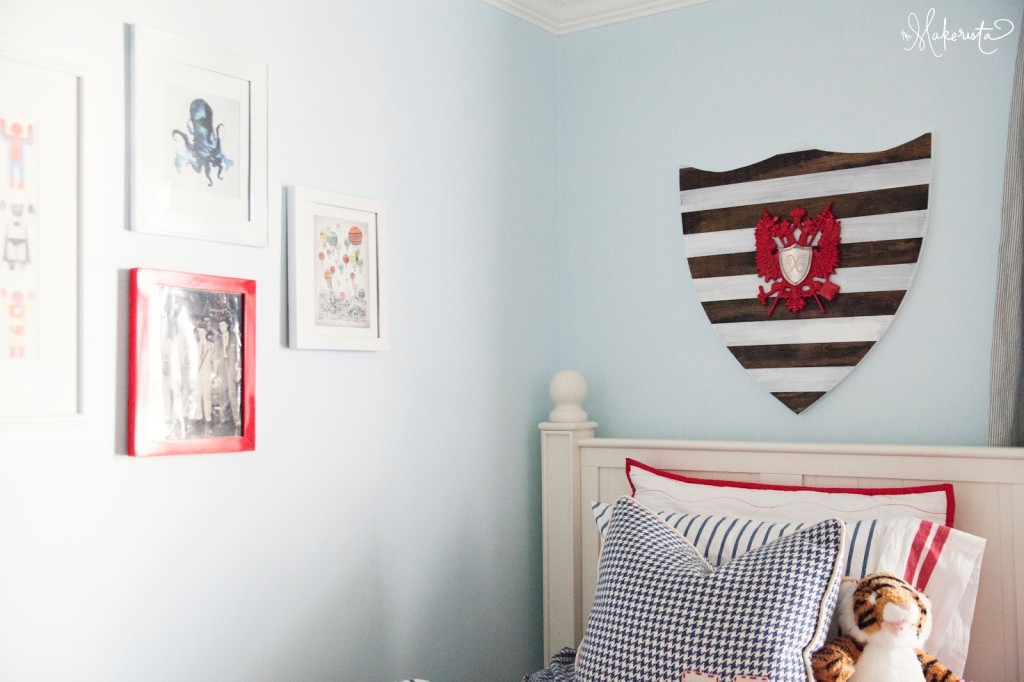
I think the shield is a really nice addition to the room. It doesn’t compete with or feel too similar to the gallery wall, but really compliments it.


I love that you made the crest work for you and your son's room. It is the perfect statement piece for above the bed. And you are so right about the creative process. I am in the middle of a few bumps in the road with our bedroom. I'm taking a few more risks and trying a few things that I might not normally do and I'm struggling connecting all the dots, if that makes sense. I know in the end it will all be worth it, but sometimes I'm tempted to play it safe so I can just be finished! lol! I just found your blog through Sarah Dorsey and I saw you were in Missouri! I am, too and it's not very often that I find other bloggers in our state! Where do you all live? We are in Columbia, but have family in St. Louis and Springfield! So nice to meet you and I love your style! 😉
It totally makes sense! I'm constantly having to reassure myself.."ok, this is black but it's ok, becuase there is some black in that thing" I'm trying to slowly redo our room too, and I know exactly what you're going through! It's the attempt to push yourself to a new level without going to crazy town. 🙂
Thanks for your kind comments, Jesse. They really mean a lot to me! Yes, I live in Kansas City. 🙂
Thanks for reading, hope you're having a great week!
This is so awesome that I think I want one now in my living room.
And I agree with Jesse (who is fabulous herself) up there: "Love your style"
Oh, thanks, Julia! I think this would look great in a living space!
This really turned out great. I love how you shared the process and that it wasn't simple and perfect. That is SO like how I craft!! Nothing I do turns out perfectly but thats what makes it diy. 🙂
I'm glad I'm not alone in this! 🙂 I had someone I know comment that everything I do is "perfect" and "do I ever mess up?" I don't want to give that impression. While I enjoy DIY and making things, it doesn't usually come really easy and effortless. I think sometimes people feel like they can't do things because when they attempt something, it never goes smoothly. I hope I can encourage people to try things, knowing that everyone hits bumps! Thanks for your kind words, Chelsea!
wow.. now this is beyond amazing!
xx
This is gorgeous! I absolutely love how you mixed patterns and textures in this room. And I'm loving your blog. Looking forward to following you along 🙂
Oh, thanks so much, Amy! And thanks for reading!
I am so loving this. What a great piece!
Love this – really cool, Gwen!!
Oh, thanks so much, Joni!
Gorgeous! I'm pretty sure I've got that same plastic shield plaque somewhere in my stash. You've given me loads of ideas to restyle it. Love your blog.