In case you missed the inspiration for this space and the initial details, you can find those here and here. If you follow me on Snapchat @themakerista you’ve seen the play-by-play of this build, but if not, I wanted to show you the process of the shelves today.

After getting an idea of what I was wanting, Micah headed to Lowe’s to get the first round of materials. As I’ve said, this hasn’t been a project where I had a clear vision from the get-go, so we’ve been buying as we figure it out. Each step has revealed the next, keeping my mind open and Micah a bit frustrated. But I had to see things to know what I liked, and my father-in-law played a good mediator amid the uncertainty. 🙂


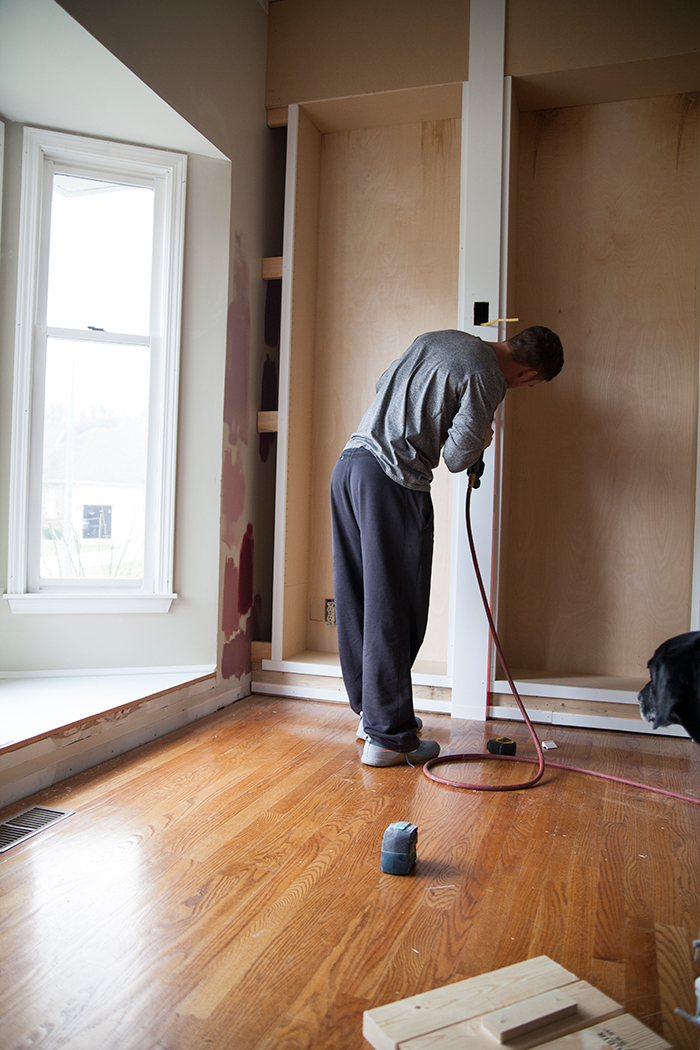
Micah and John have been working every chance they’ve had over the last three weekends, and watching them work is one of my favorite things! That sounds very lazy…but I make a pretty good assistant! They started by creating a base for the shelves to sit on out of 2x6s.


Then they ripped down MDF boards into 12″ panels and used this amazing tool to add peg holes for the adjustable shelving. I went back and forth on stationary and adjustable, but at the end of the day I wanted the flexibility. Plus, the dark paint will keep the holes from being very noticeable. After piecing together the sides they added a thin sheet of plywood for the backing.


And spaced the cases evenly on the base. Then they attached everything together I don’t know how – ha! and added supports for the columns.

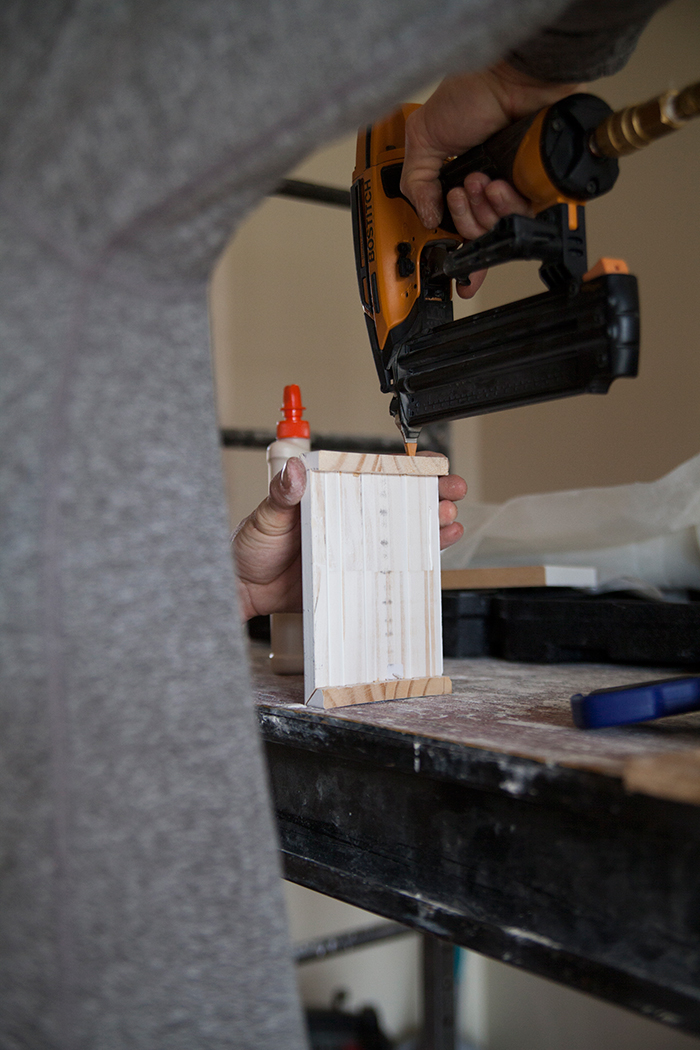
The next weekend Micah finished off the top by adding in another frame of 2x6s to support the library ladder and covered it all with MDF to complete the built in look. This was when things got a bit more wishy washy. I wasn’t totally sure how I wanted to trim the cases out, I’m visual, I need to see things! so we spent a lot of time practicing and cutting little pieces to play with.

Other than getting the scale right, there were the sconces that we had to contend with: is the trim between wide enough? How high should the lights hang? Let’s get the chandelier out and see for reference. Micah loves this stuff.
I really wanted the dividing columns to have some presence so we decided to stack a few pieces to give depth. And this way the trim and crown would wrap around the columns.

Micah is not a finish carpenter, but he’s picked up a lot from his dad thanks to my requests. I’ve been really impressed with what he’s learned to do!

I knew exactly what I wanted to do with the base, but the top of the shelves were a little more tricky.

We added picture moulding an inch and a half below this crown and that whole space will go the same color, making the crown appear even bigger.

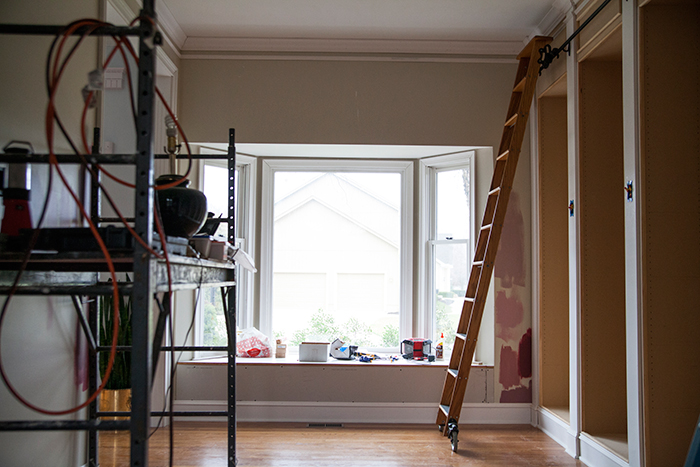
Micah built up the bay window platform to create a window seat like we did in the dining room. It’s much more functional now and will make a cozy reading spot.
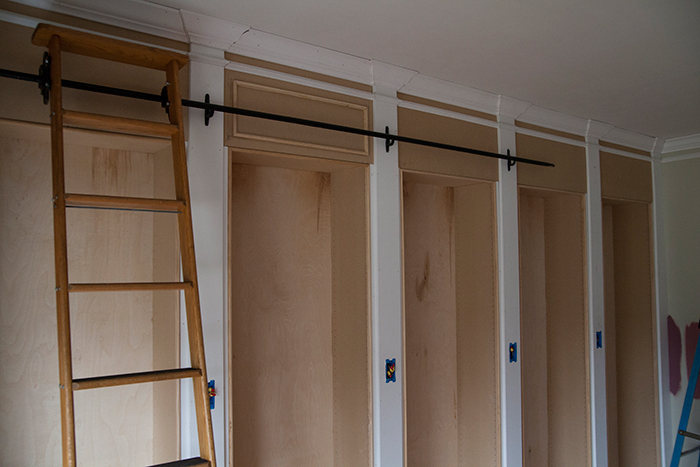
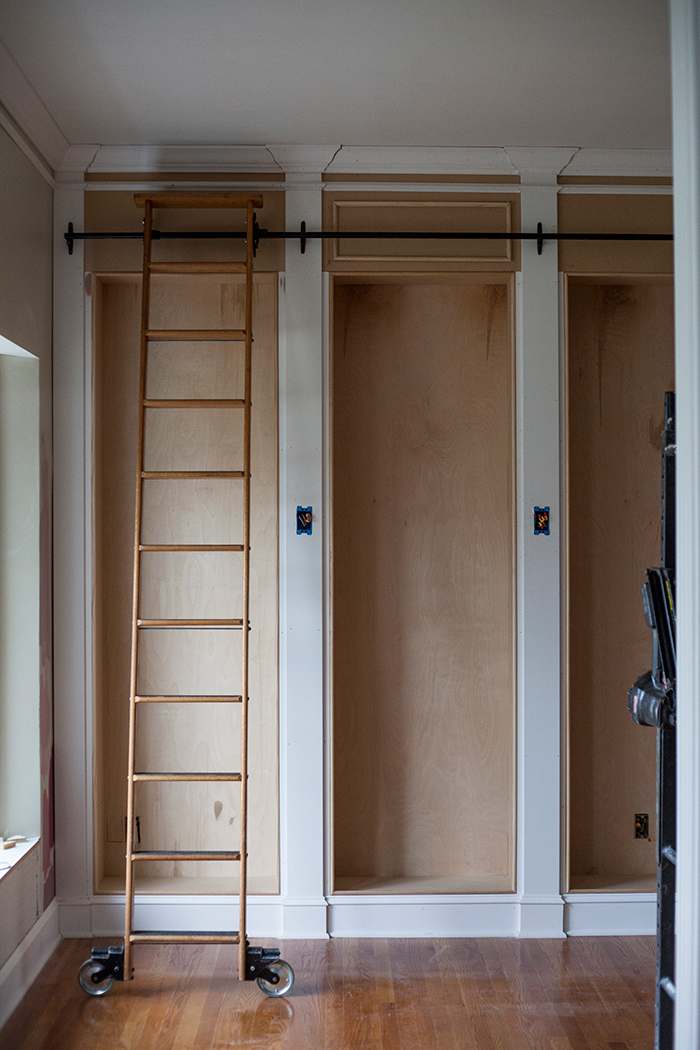
I cleaned up the library ladder I found on craigslist last year, and gave the hardware a fresh coat of paint before we tested out the spacing. We put it up to see how it would fill the area above the bookcases, and it was a good idea to determine the pole height before we paint, in case we needed to fill holes.

I think the spaces above the cases need the picture frame trim, but Micah doesn’t like it. I told him I’d think about it. Even though I’ve already made up my mind. I don’t think he realizes once it’s all the same color it won’t be very noticeable. He thinks it’s too much, and I’ve realized something: I’ve never once seen a room with moulding and thought “that’s too much moulding.”
What do you think? To mould or not to mould?
*This post is in partnership with Lowe’s. I am so thankful for the people at Lowe’s, who believe in my visions and help make my dreams a reality. Thank you for supporting the brands that make these projects possible.


I need so many emojis right now. This is going to be out of control!!!!!!!!!!!!!!
Definitely add the moulding! I see what he's saying about it being too busy right now, but I would keep in mind that there are dozens of different shades of wood going on. When it's all painted out the same color, it will fade into the background and be a lot less busy. Without it, I could see it looking too plain and bland. Loved the update, I'm so excited to see the progress!
I love this!!!! Moulding I have no idea, but books, shelves and rolling ladder, Awesome!!
Nicole (your neighbor)
Gwen this looks amazing and I can't wait to see the finished product! I love the moulding and think it adds a lot!
To mould! I love it and LOVE the moulding. Micah will come around!
Oh this is going to be unbelievably gorgeous. I'm exactly the same – I need to see stuff before I know for sure and I'm constantly saying to my OH, 'Wait, hold this here' and then 'no, lower it… no higher… wait, try it on this wall instead' Frustrates him no end! Ha! Definitely do the moulding! Once it's painted, it will look beautiful. xxx
It needs the moulding to add depth, otherwise it's too plain.
Love it! I can't wait to see it complete. Definitely add the moulding. It completes the look. I am so glad that there are others out there that have to try different options before making up their mind (thank heavens for husbands who are a good sport).
Without a doubt, add the molding!! Love this!
Oh, you've got to have the moulding! I think it looks unfinished without it. So so pretty, can't wait to see it painted!
I die! I dream of beautiful woodwork, but then I receive an estimate for labor and run away in tears. I can't wait to see it!
It looks amazing so far! Definitely add moulding! Actually, I would add even more. It will blend when it's painted and almost become more of a texture.
MOULD MOULD MOULD! It is going to look Beautiful!
Yes to the molding- it echoes the dining room moldings. The progress looks amazing! Go Hefners!
wow Gwen! this is going to be one incredible room once its finished! Can you help me with mine? (no, seriously.)
You are taking it to the next level with these! Gorgeous!!!!!!!
WOW! This is absolutely incredible! You are visionary. Definitely to mould!
Yes to the moulding and hubba hubba to your hubby. His talent is sick. I can't believe he likes to play around with your visions and see how "the chandelier might look" at certain heights. My husband and I are both so impatient and tired by the time we actually conclude a project, we just slam it together any ol' way.The bookshelves give the front room a completely different look — I love it.
I enjoyed watching the process. So exciting seeing the progress!!!
These are going to be so great!! I want to install some myself, so please post all the details. Except we have 8' ceilings so they won't be quite as grand.
Those are going to be some epic built ins! Well done!
Oh, man…LOVE these built-ins. And I hope Micah doesn't think we're teaming up on him, but you have GOT to add the moulding! It would be a shame not to! Cannot WAIT to see this room evolve! Merry Christmas, Gwen. 🙂
Wow, these are amazing. I vote for the moulding. Can not wait to see this room finished. You finish a room and I think to myself that she can't top that room and of course you do!!! You have an incredible eye for detail and it shows.
I'm obsessed!! It looks so good!
To mould! Already the transformation is incredible!
So excited about this project!!! I 100% agree, never too much moulding!
Yes to the moulding! Make sure you test the ladder clearance on the sconces….!
Definitely to mould!!! This is going to be stunning!
Built-ins are my favorite! Ours aren't nearly so fancy as what you're building (by even half) but they are still one of the main attractions when we bought this house. So much storage, so many excuses for books, and makes it feel even more like a home and not just a house. Mostly, the excuse for more books thing.