This post has been three years in the making. That sounds dramatic, but since starting this blog I’ve received questions about photography. I can’t tell you how many “blog post idea” lists I have made with photography as a subject. Somehow I’ve never gotten around to it. I get questions quite frequently regarding what camera I use, where I learned to take pictures, and the like, but I’ve never compiled it all together in a neat little spot that I can send people to. It’s about time I did just that.
When Xander was born I started taking a lot more pictures. They were mostly on my phone, but all of a sudden I had something that I wanted to capture: to share with others and hold onto for memory’s sake. One Christmas I asked my sister-in-law (who was the family photographer – we all have that person, right?) if I could borrow her camera to get some shots of the tree I had decorated that year. I wanted pictures at night, and my phone wasn’t cutting it.


I set the Canon Rebel to automatic and snapped way. While I had it, I also took some shots of Xander. Because of some graphic design work I had done I had Photoshop on our desktop. Because I had become a blog reader I knew about the Pioneer Woman’s actions that’s rather obvious by that tree photo, yikes. I started playing around and was totally hooked.

That Christmas I asked for a Canon Rebel XSi. Nap times that used to be filled with reading about parties and lettering were now filled with photo tutorials and playing with my camera. I practiced on things around the house, but I really loved capturing my son. Over time I got some better lenses and upgraded to a full-frame camera. I’d been dreaming of blogging for several years at that point, but the photography piece was the thing that gave me a “no excuses” start to blogging.
Now that you know a bit about how I got my start, I want to share some of what I know. I have never taken a class, and I don’t claim to be a professional, but I think I’ve learned a good amount and want to share some of the resources I’ve used to hone the skills and some personal tips and tricks. I’ll start with some beginner information and then touch on how I shoot for the blog/interiors, along with how I edit.
FOR THE BEGINNERS: If you’re interested in learning photography but brand new to the art, this is what I would recommend.
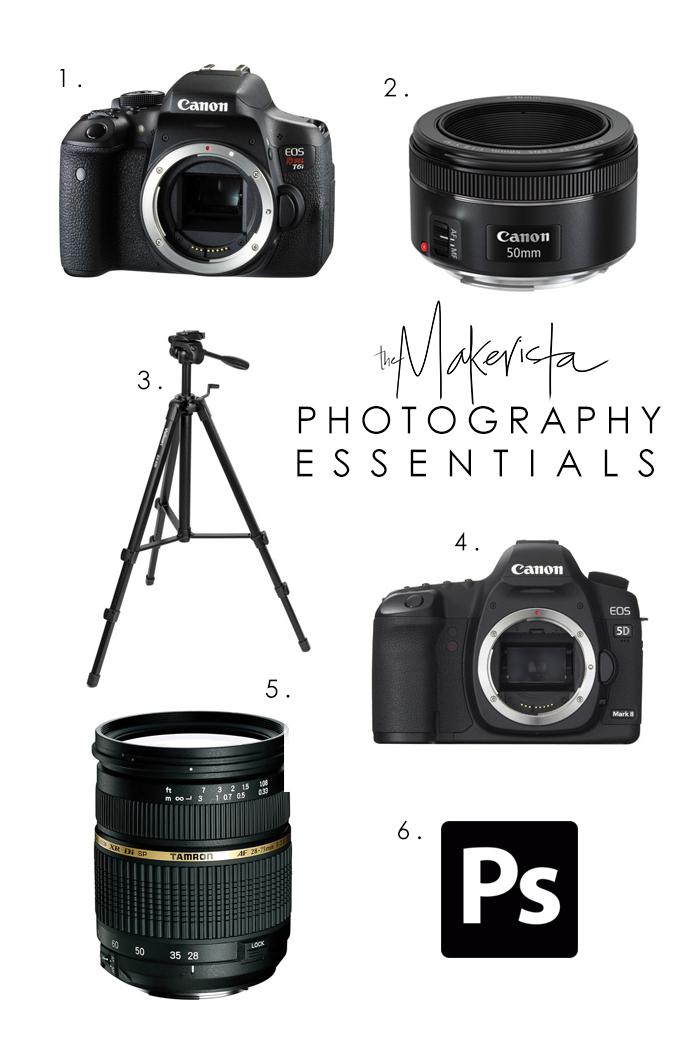
I prefer Canon because it’s really user friendly and the lenses will fit all of the bodies not the case with Nikon. I would start out with a Rebel, but just purchase the body and skip the lens that is available with it – it’s no good. If you’re wanting to take pictures of people I would buy the 50mm 1.8 lens. This prime lens (one that cannot zoom in or out) is going to give you the best quality and softest images what you want with portraiture for the price.
Get yourself on Pinterest and search for photography tips here’s my photo board with some of the info I’ve found helpful. Spend hours upon hours taking it all in and then spend lots of time practicing what you’ve read. When I was learning I would read anything and everything I could get my hands on regarding how my camera worked and how to shoot manually. Words like aperture and ISO took a lot of reading and doing to finally sink in and become common knowledge, but once they did, things got a whole lot more fun. Some of the best, overall tutorials I remember were Kevin and Amanda’s, The Pioneer Woman‘s, and My 3 boybarians‘. You’ll need Photoshop and/or Lightroom. They used to cost an obscene amount of money for someone just wanting to learn a new hobby, but now you can get both for $9.99 a month – a much smaller investment.
WHAT I USE NOW: A few years in I upgraded to the Mark 5D ii and it makes such a difference. The quality in low lighting situations is so much better, and the full frame shots are awesome for interiors. I can push this camera so much more than I could the Rebel. I still have the 50mm lens and use that if I’m shooting my kids, but for my interior shots I use the Tamron 28-75mm 2.8. It was ranked one of the best versatile lenses for the price, and I have been really happy with it. Lenses are not cheap, but they are just as important to getting a quality shot. This one allows enough space to shoot fairly tight rooms and enough flexibility to chase kids around a party too.
Heads up. If you already shoot manually, feel free to keep reading. If not, the rest might be a whole lot of foreign language to you…
HOW I SHOOT INTERIORS: When I shoot interiors I get my big shots first. I start far out and then work into the details. Tripod, tripod, tripod. I want to be quick and lazy and just hand shoot everything, but when I do I almost always regret it. In order to get great, crisp, pulled back shots I crank my depth of field up to 32 and I set my ISO at 100. Then I set the shutter speed from there. I can’t tell you how many 30 second exposures I shoot hundreds. It means taking about an hour to shoot 30 or 40 images sometimes, but I never regret the shots. I’ve tried using lights to speed up the process, but I just don’t love working with them – the basement has been my first and only experience.
After I get my wide shots I move into vignettes, usually using the same method but sometimes taking the depth of field down to f/9 or 10. Now, details I will shoot handheld if the lighting is good, but I’m typically shooting those anywhere from f/3-5, so I don’t have to have my shutter speed so low. I never allow my shutter speed to go under 40 while holding the camera, so for these I will allow my ISO to go to 500-640. I prefer to stay under that though. Some of my very best photographer friends think I’m crazy for avoiding the ISO, but they are working with much more expensive lenses and cameras, and there is proof in the images.
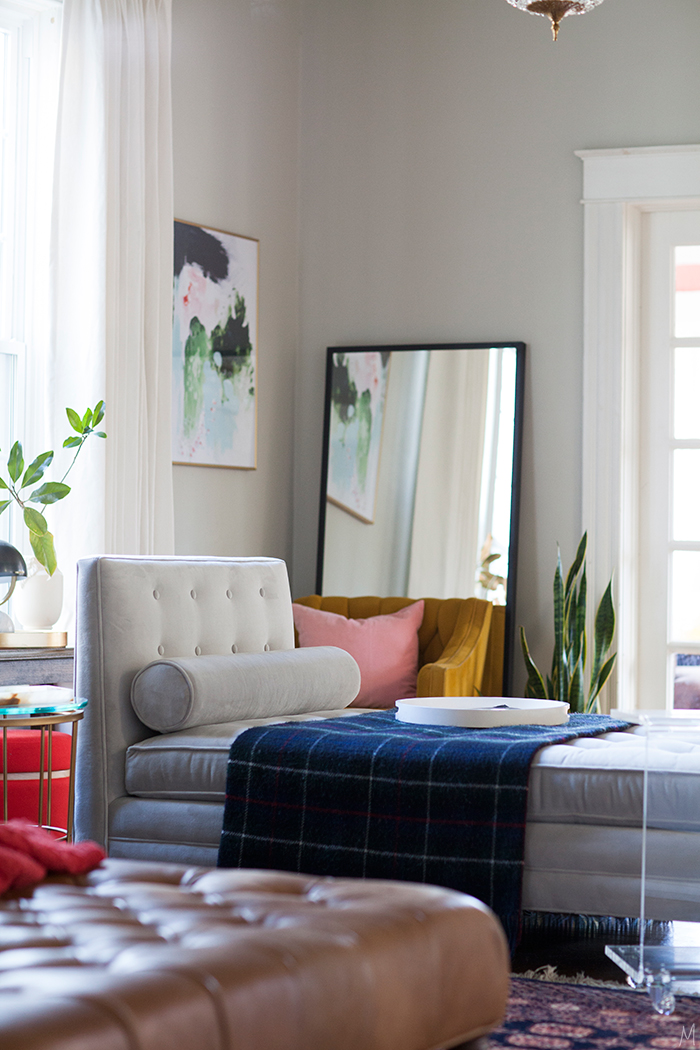
Xander’s room has one north-facing window so the lighting can be tricky. Above is something I shot by hand in a hurry with a higher ISO I believe I was around 1250. As soon as I started editing this shoot I regretted not getting out the tripod.
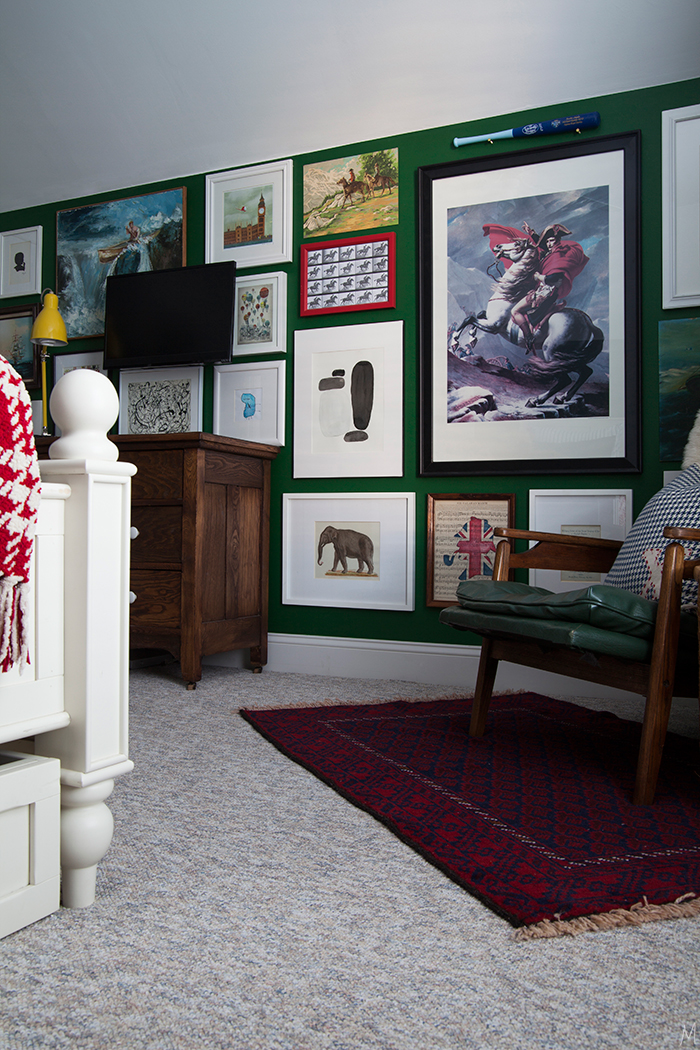
And here is the same space using the tripod. Both of these images required me bringing up the shadows in editing quite a bit, but if you look closely I was able to push the second one more and it still remains crisp and clear. The tripod is worth the time.
EDITING INTERIOR SHOTS: I shoot everything RAW. This allows you to manipulate the image much more afterwards if necessary without loosing quality. I open everything in Camera Raw this is something that comes with Photoshop and do 90% of my editing there. I hear lightroom is the fastest, but this is how I learned and you know what they say about old habits… When you shoot RAW your camera is not touching the image at all. You get what you shoot. When you shoot jpeg your camera will add in some contrast and adjust the image to what it thinks might be pleasing. So it’s essential that you tweak RAW images. For my interior shots I’m usually bringing up the shadows, adding in contrast and a bit of clarity. Sometimes I’ll raise the lights and if the color is a bit off, this is where I play with the white balance.
From there I save the images as jpegs and open them up in Photoshop to do any minor adjustments, like editing out dog hair insert eye roll here, sizing for the blog, and adding my watermark. Thanks to one of Jen’s tips, I always “save for web” and that has made a big difference in the quality of my photos online. Speaking of Jen, her post is filled with a lot of things specific to blog photography and interior shots, and she is queen of using a light kit to photograph dark spaces. Be sure to check her whole post out, it’s filled with a lot of great things I didn’t touch on here.
There was no way to cover it all, so let me know in the comments below what I missed or what you would like to know more about!

Such fun tips! I didn’t know that about canon lenses fitting all canon bodies – so happy to hear! I’m planning to upgrade into a full frame Canon the end of this month (fingers crossed), ditching my nikon forever, and not sad about it.
That’s exciting! I really love the ease and versatility…everyone I know with Nikon’s has to get all new lenses when they get new bodies and that just seems crazy to me! Which one are you planning to get? I think you’ll be super impressed with the difference!
Gwen, thanks SO much for this post, and the links to Jen’s page. I started blogging weekly a few months ago for Home Glow Design, and I took a photography class through community ed as I got started. It gave me enough info that I know what you’re talking about, but I needed the extra tips on interiors specifically. Hoping to up my photo game on the blog in the coming months! Quick Q — I’ve been working with the Photoshop Elements free trial (about to expire) and I need to decide to go Elements/Lightroom/Creative Cloud. What have you heard about comparisons?
So good to hear! I can’t speak much for Lightroom because I don’t personally know much about it, but I hear from so many people that it has a great workflow that is much faster than PS. That being said, most people who use Lightroom still have to have PS for some things. I don’t think you can buy elements anymore, can you? I’d definitely do the 9.99 a month for PS and LR…since you’re contributing to someone else you can write the expense off I would think! Good luck!
Thank you for the informative post! I am working on my interior photography skills and posting home tours on my blog to keep practicing. One thing I had not found much information on before your post is how high to set the aperture for interiors. I knew it would be high, but never knew how high. I really appreciate you sharing. Your photos are incredible!
You’re welcome! Again, that’s just a personal choice, but I find the higher it is, the better I like the pulled back shots. Have fun playing around!
Thanks for the post! Lots of great info and I think it’s solidified my decision to replace my current DSLR (the original Sony Alpha!) to a Canon, especially since I have my Dad’s old film Canon and lenses.
That’s fun! I don’t know that lenses from film fit digital cameras, but it’s worth looking into!
This is a great post! I took the Shoot Fly Shoot classes last year and that pushed me into finally understanding how my camera worked. I really feel like I’m being held back, I am still shooting with my Rebel t3i and I just am not getting what I want. I am hoping to win the lotto and upgrade to a better body and be able to invest in a 35mm lens:) Your pictures are always stunning and well lit – I needed the reminder to use my tripod more! It’s so easy to try and do everything handheld but you’re right, interior shots are so much better with a long exposure.
I’ve heard great things about those classes! Glad this was helpful, and yes, I think a tripod can do wonders with any camera!
Gwen, thank you so much for sharing how you take your photos. I’ve been playing with my ISO, aperture, etc trying to get the right combination for my interior shots. I have some pretty dark rooms, so I’m excited to try your methods.. I agree, it’s fun learning and seeing your progress 😉 Thanks again!
So glad to hear! Good luck!
What you said about Nikon is not true. I have one and constantly borrow lenses from friends. I also inherited a few from my father in law. The lenses from one camera fit others as well as long as they’re not too old (you can’t work with autofocus if the lense doesn’t support it, but that’s about it). Canon changed there bodies a few years ago and many people had to get new lenses for new cameras since the old ones didn’t work any more. Now one lense fit’s all “newer” models, but that’s the same with Nikon (at least in Europe).
I don’t know that from experience, but I’ve been told that by several Nikon professional photographer friends and see them having to sell several of their lenses when they get new bodies. I know some lenses fit different models, but I don’t think that all do. Just an observation, glad you haven’t had that trouble!
You are both correct! As a professional photographer using both Nikon for many years and changing to Canon both systems had their ‘transition’ issues when they moved from film to digital and then with improved digital changed again…. Some good tips Gwen, but I would encourage people to buy a Canon lens rather than Tamron whenever possible.
I totally understand that recommendation. I just haven’t had the funds to go Canon myself and have had pretty good luck with the Tamron. Just sharing my personal experiences!
And something else I love about your photography that you didn’t touch on is your composition and the angles you shoot. I guess that’s something you just have to practice at and some of it is personal preference, but you’re so good at that part too. I use a Nikon and just upgraded the body to full frame and some of my previous lenses weren’t full frame. I can still use them (ie. they technically fit the body, but they won’t give me the full frame shot 🙁
Oh, that’s sweet. I definitely prefer really straight lines and angles, but that also limits me sometimes so I’m trying to get more outside of that “straight on shot” box. 🙂 Ok, maybe that’s it with the lenses. I’ve just heard from several people that they had to sell their lenses when they upgraded bodies. Glad to hear they can still kind of work though!
Fascinating! Thanks! I’m a pretty good amateur photographer but am much better at portraits than interiors. I love your interior shots, you do amazing art in your designs and your photos. Thanks so much for sharing!
That’s nice! Yes, I started out doing portraits and now I have a bit more trouble! You have to be so much quicker capturing people. 🙂 Thanks for reading!
I loved reading through this and what a nice and sweet surprise to see my post mentioned as well. Thank you so much! I really admire your work and your photography and this was a wonderful read, I definitely picked up a few new tricks!
Oh, thanks for sharing all you did in your post! That saving for web thing was a total game changer for me!
I’m actually supposed to be working on my contributor post for Jen, but I fell down the rabbit hole of your gorgeous blog!
Oh, you’re sweet friend! 😉